How to activate Volume Licenses (VL) or Multiple Activation Key (MAK) step by step

The Multiple Activation Key “MAK” or Volume License “VL” is mostly used in companies that require the activation and licensing of Office or Windows due to its low cost. In this guide we will explain how to activate these licenses easily, quickly and securely.
IMPORTANT: It is recommended that the activation of the MAK key or Volume License be performed by the IT professional. Remember that an erroneous activation will cause the MAK key to be blocked.
What is a Multiple Activation Key “MAK”?
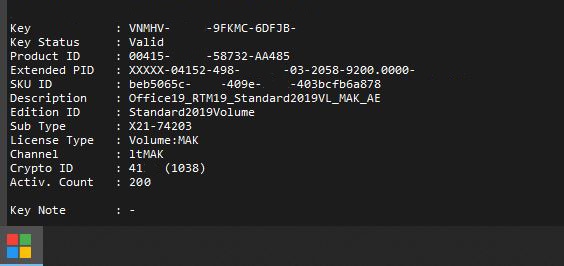
MAK keys are used to activate a specific number of devices. The count is preconfigured as an agreement between Microsoft and the purchasing company. Each time a device is activated using MAK, this is what happens:
- The connection is established with Microsoft’s own activation service.
- The key is verified, i.e., it is validated whether further copies can be activated using that key.
- If that is a yes, 1 is subtracted from the number of activations still available.
Note: If the computer is reinstalled or the hard disk is wiped the activation will be lost, the count is not returned or increased. This is especially useful for customers where reinstallation is infrequent and the machine remains as is for a long period of time.
How to activate Multiple Activation Key “MAK”?
1 . After receiving the license, follow the steps below. Download Office Deployment Tool.
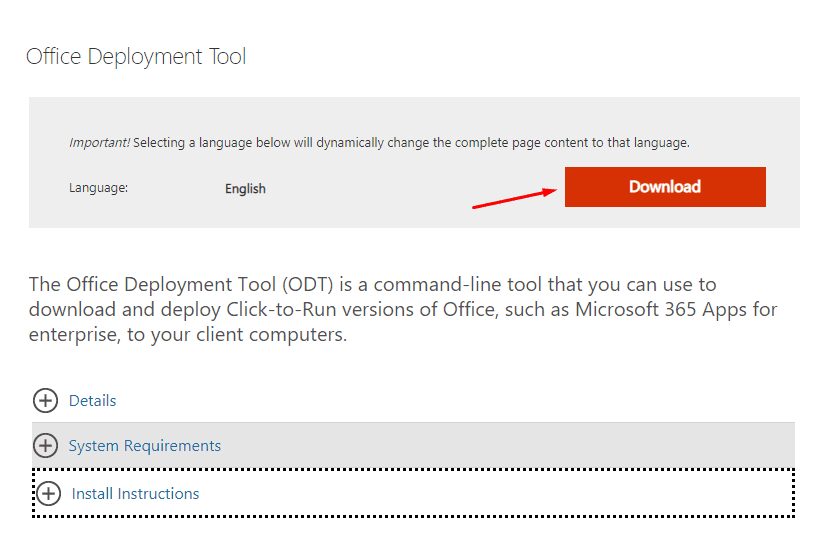
1 . 1 . Run the self-extracting executable file, which contains the Office Deployment Tool executable (setup.exe) and the sample configuration XML files. It is recommended to create the folder where the files will be extracted on your computer desktop.
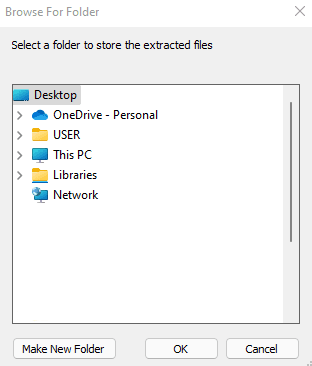

IMPORTANT: We recommend that the configuration of the XML file be performed by an IT professional to avoid blocking the license (we are not responsible if an erroneous activation is performed and the license is blocked).
2 . Configure XML file.
In the example image you can see the .XML file configured for the installation and activation of Office 2019 Professional Plus x64.
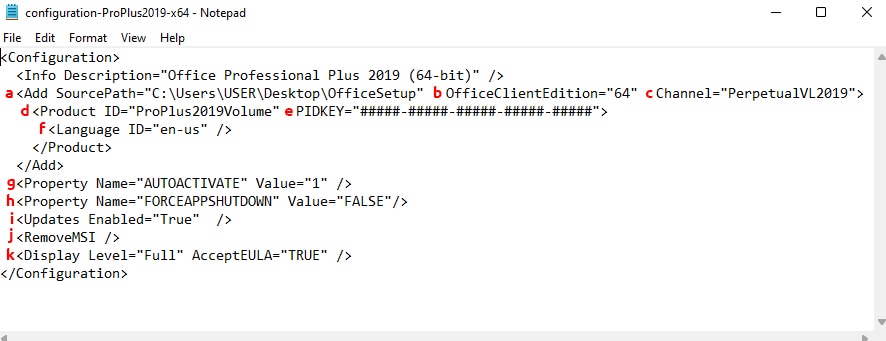
a. SourcePath: Where to download the Office installation files and where to install it from.
For example, \server share (a shared folder on your local network).
If you do not specify a source path when using the ODT to install Office, the ODT looks for the installation files in the folder where it is located. If it does not find the Office installation files there, it goes to the Office CDN to get the installation files.
b. OfficeClientEdition: which edition of Office 2019 to download or install.
For example, the 64-bit version. / Valid xml values are “32” and “64”.
All Office products on the computer must be of the same architecture. You cannot have both 32-bit and 64-bit Office products installed on the same computer.
We recommend 64-bit on computers with 4 gb or more of memory. However, you should consider application compatibility and other factors that may force you to use the 32-bit version.
c. Channel: The update channel from which to install and obtain updates.
Office uses the concept of update channels to determine which updates an installed version of Office receives.
d. Product ID: Download and install the version of Office you need.
f. Language ID: Which languages to download or install.
For example, English (en-us) and French (fr-fr).
You can install multiple languages at the same time you install Office 2019, or you can install them later.
g. AUTOACTIVE property (part of the Property element).
Optional. Default is 0 if not specified.
Since Microsoft 365 Apps is configured to activate automatically, you should not set this property for Microsoft 365 Apps products. For other products, you can set AUTOACTIVATE to 1 so that the product is automatically activated.
Allowed values:
Property Name=”AUTOACTIVATE” Value=”0″
Property Name=”AUTOACTIVATE” Value=”1″
h. Property FORCEAPPSHUTDOWN (part of the Property element)
Optional. Defaults to FALSE if not specified.
When set to TRUE, forces to close any application that is blocking the Office installation. Data loss may occur.
Allowed values:
Property Name=”FORCEAPPSHUTDOWN” Value=”FALSE”
Property Name=”FORCEAPPSHUTDOWN” Value=”TRUE”
i. Updates Enabled=”TRUE”: Office will check for updates.
j. RemoveMSI: If you want to remove previous versions of Office Windows Installer (MSI) before installing Office 2019.
We recommend that you uninstall any previous versions of Office before installing the volume licensed versions of Office 2019. To help you uninstall Office versions that use Windows Installer (MSI) as the installation technology, you can use the Office Deployment Tool and specify the RemoveMSI item in your configuration.xml file.
k. AcceptEULA attribute (part of Display element)
Optional. Defaults to FALSE if not specified.
If AcceptEULA is set to TRUE, the user does not see a Microsoft Software License Terms dialog box. If this attribute is set to FALSE or is not included, the user may see a Microsoft Software License Terms dialog box. We recommend that administrators set AcceptEULA to TRUE.
Allowed values:
AcceptEULA=”TRUE”
AcceptEULA=”FALSE”
At this moment you should have the folder (Office Setup) created on the desktop of your computer and inside this folder you should have two files:
- The .XML file (configured correctly)
- The executable Office application (Setup)

3 . Open CMD prompt from the Windows explorer window where the “OfficeSetup” folder is located (type CMD in address bar). Click in the address bar of where the OfficeSetup folder is located and type CMD, then hit enter.
4 . Type this in the cmd line: setup /download configuration.xml (The file will download in the background. You won’t notice any change until new line appears in CMD line.)
5. Now, type this in the cmd line whenever it finishes downloading: setup /configure configuration.xml (It will now begin to install. You do not need to enter the license key, as it is already in the XML file.)
Open the “Word” Office application and go to the “Account” section where you should see your product activated and ready to use.
